BLOG
—
What Does a Machine Learning Project Look Like?
Every machine learning (ML) project is a journey. The journey typically involves an agile process of data discovery, feasibility study, building a minimum viable model (MVM) and finally deploying that model to production.
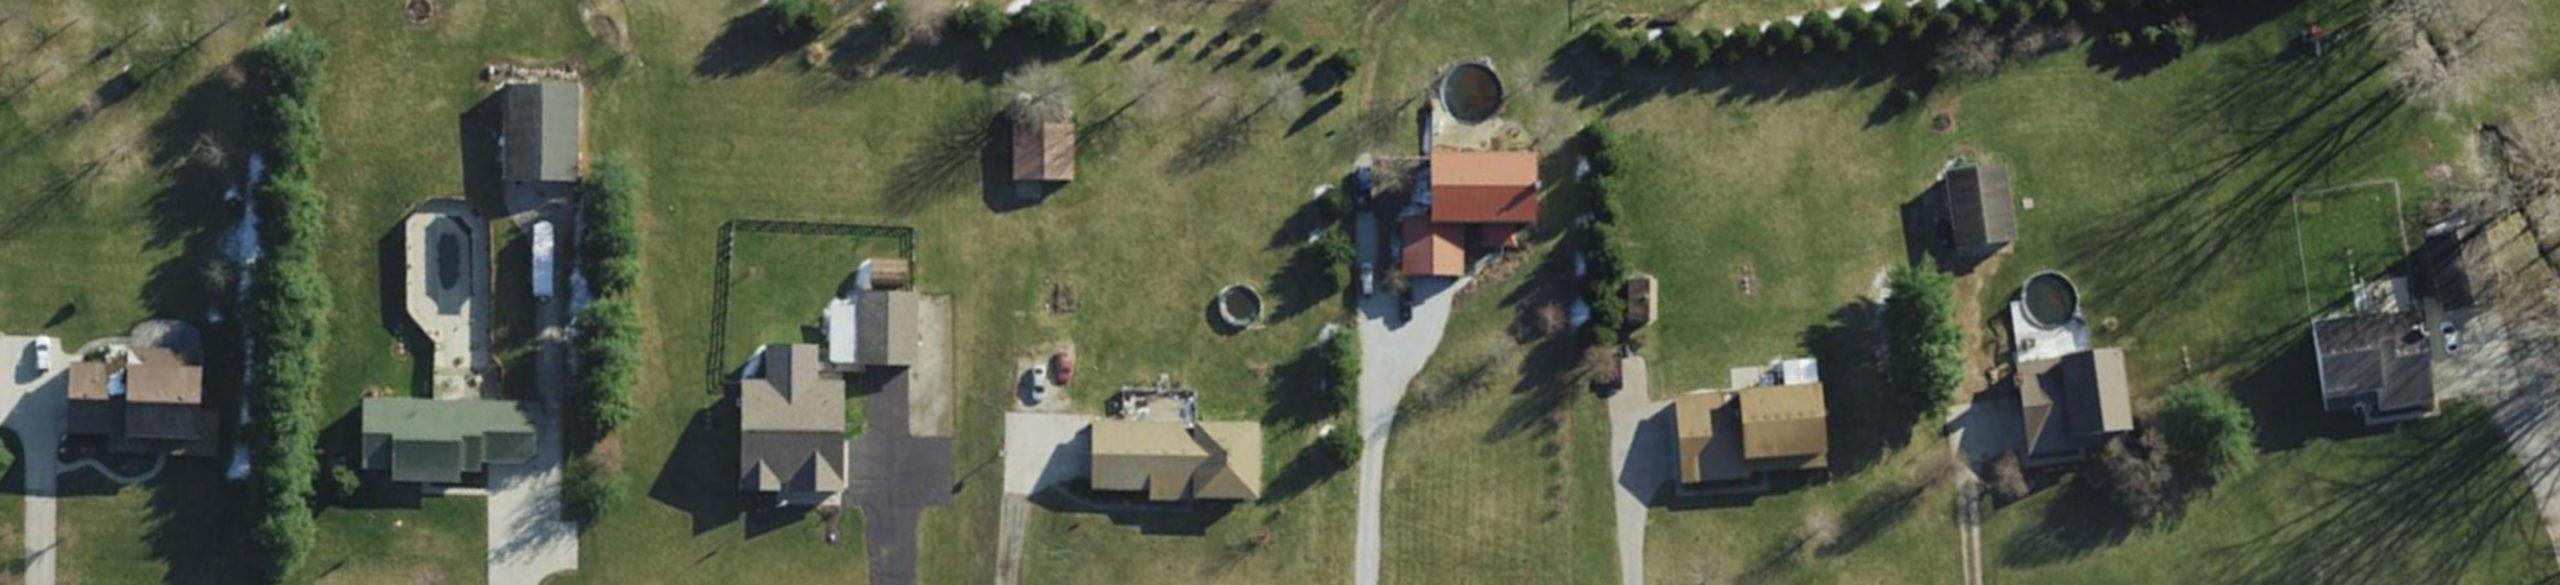
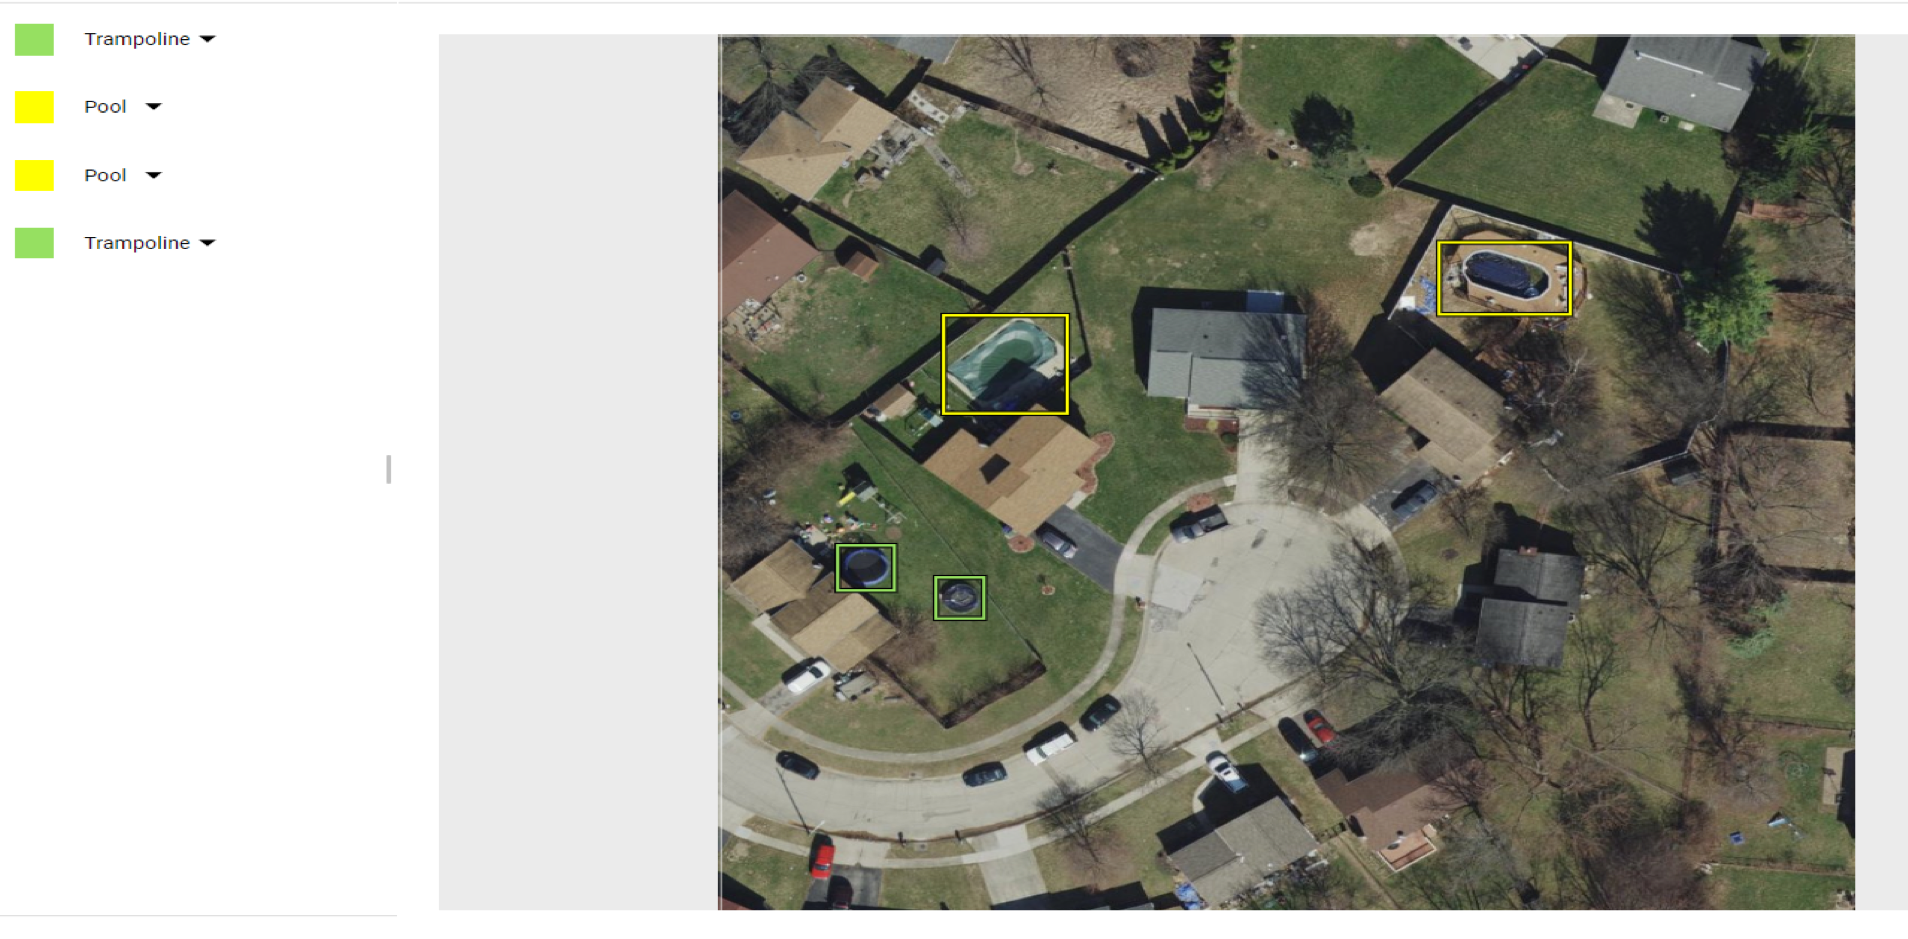
In this blog post, I want to share the story of one recent ML journey I went through here at Woolpert. This story begins with the development of Woolpert’s STREAM:RASTER™ product. During that time, I noticed a rather large number of pools and trampolines in the backyards of homes in Fairfield County, Ohio (you can browse yourself using the STREAM:RASTER demo—it won't take long to spot them). As a customer engineer with a desire to learn more about ML and a drive to create low-friction solutions for our customers, I thought it would be a good idea to use ML to help identify pools and trampolines.
Beginning an ML Journey: Data Discovery and Feasibility Study
An ML journey starts with defining a question. The question I had was: Where were all the pools and trampolines in a given geographic area? With the question defined, I needed to explore and discover the data required to answer it. I found that Woolpert’s aerial imagery was a perfect fit, having high enough quality and resolution to support the training of my model. This is step 1 and 2 indicated in the image below.
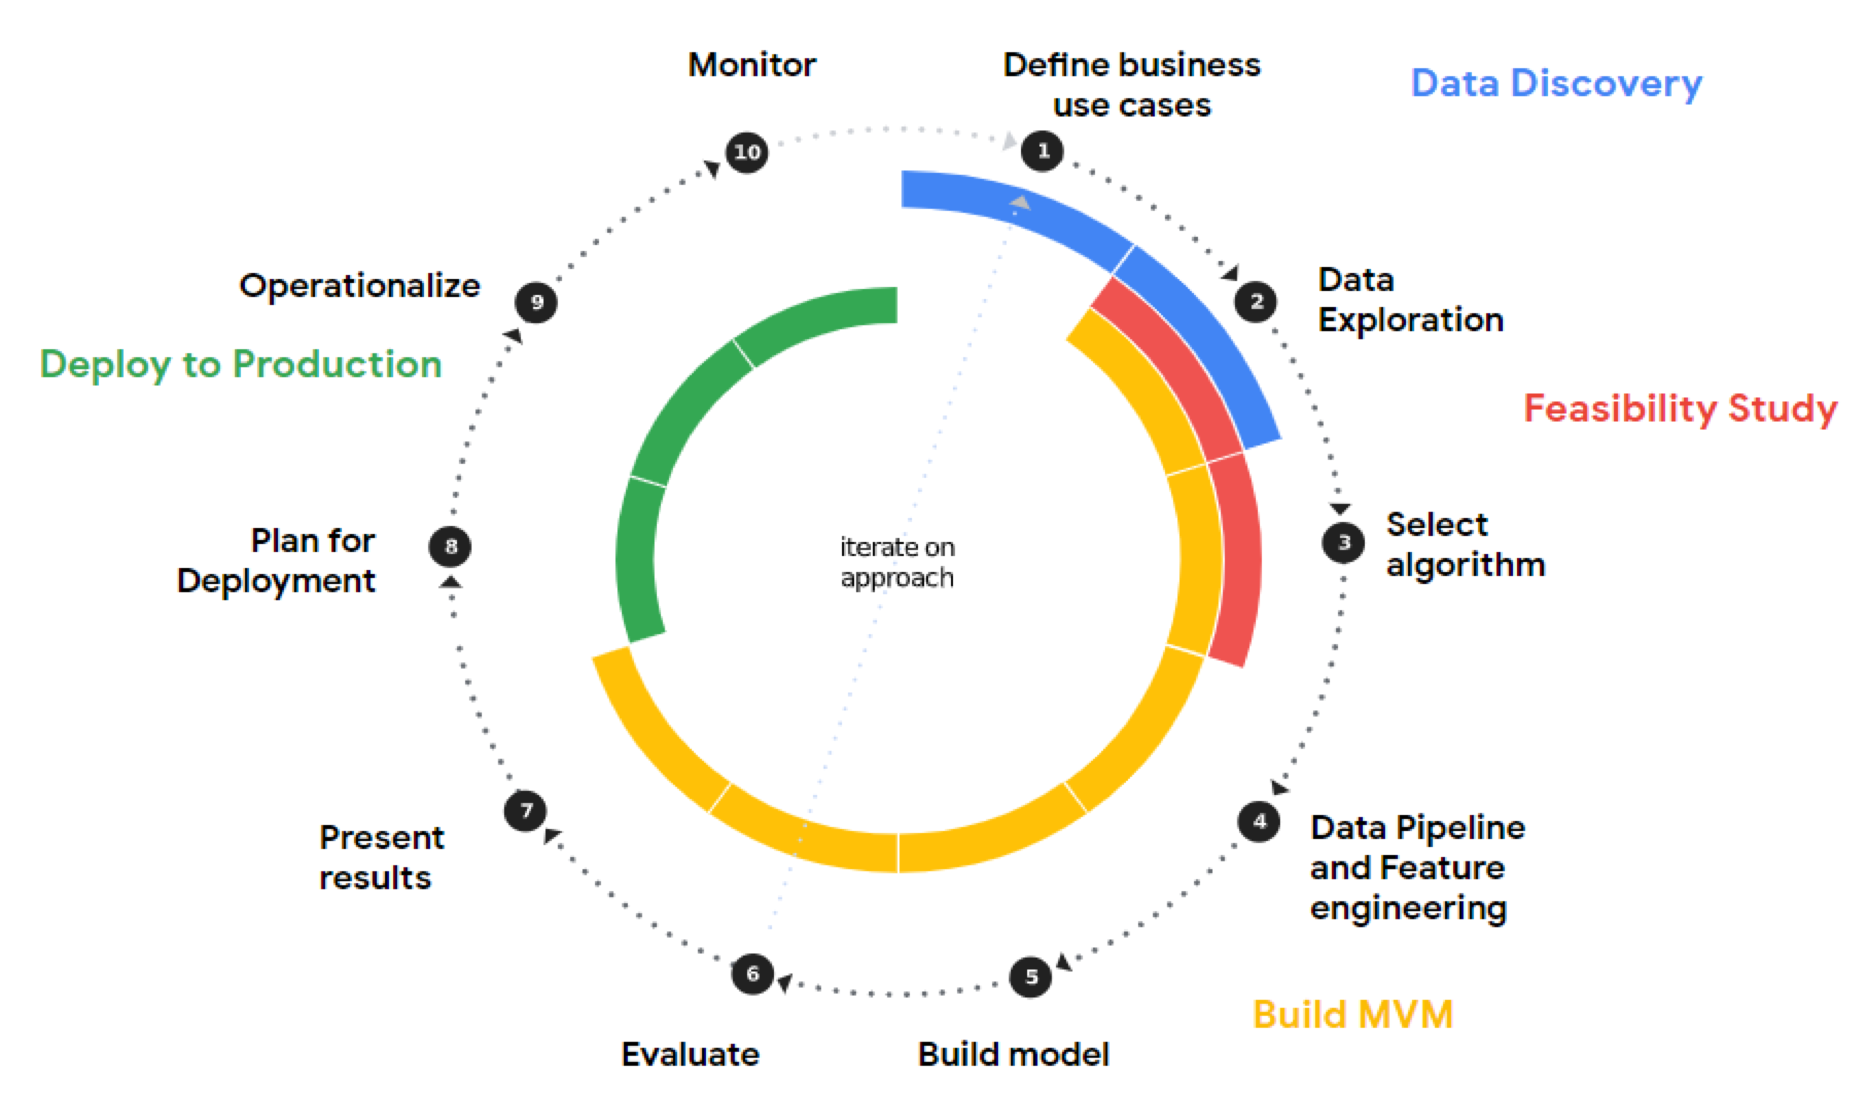
The next step in an ML journey is choosing an algorithm. The chosen algorithm should provide predictions as output for the questions. In my case, it also needed to be easy to use and deploy in the shortest amount of time. I did not have time to spend countless hours implementing the deep learning algorithms of object detection; instead, I needed a self-servicing solution that was fast and easy to use. This led me to Google Cloud AI Platform. This platform has a spectrum of offerings for those needing to do artificial intelligence (AI) and machine and deep learning in the cloud.
After a bit of research on the platform, the algorithm I chose was Google Cloud AutoML Vision Detection. The features and capabilities of this product were the perfect fit because the build-out of my MVM could be done entirely in the web console, requiring no programming or server management/maintenance, and I only paid for the training and prediction time used.
Building Out an MVM to Present Results
The next ML journey step is building an MVM; this is presented as steps 4 (Data Pipeline and Feature engineering) through 7 (Present results) in the image above. In building out my MVM, I was able to leverage a concept called transfer learning. By using transfer learning, I didn’t have to train my model on the general use case of identifying objects in images—Google had already done that. Instead, I provided additional training to the model, by AutoML Vision Detection, so it could learn the specifics of how to identify pools and trampolines from aerial imagery.
Closing an ML Journey: Deployment and Operationalizing
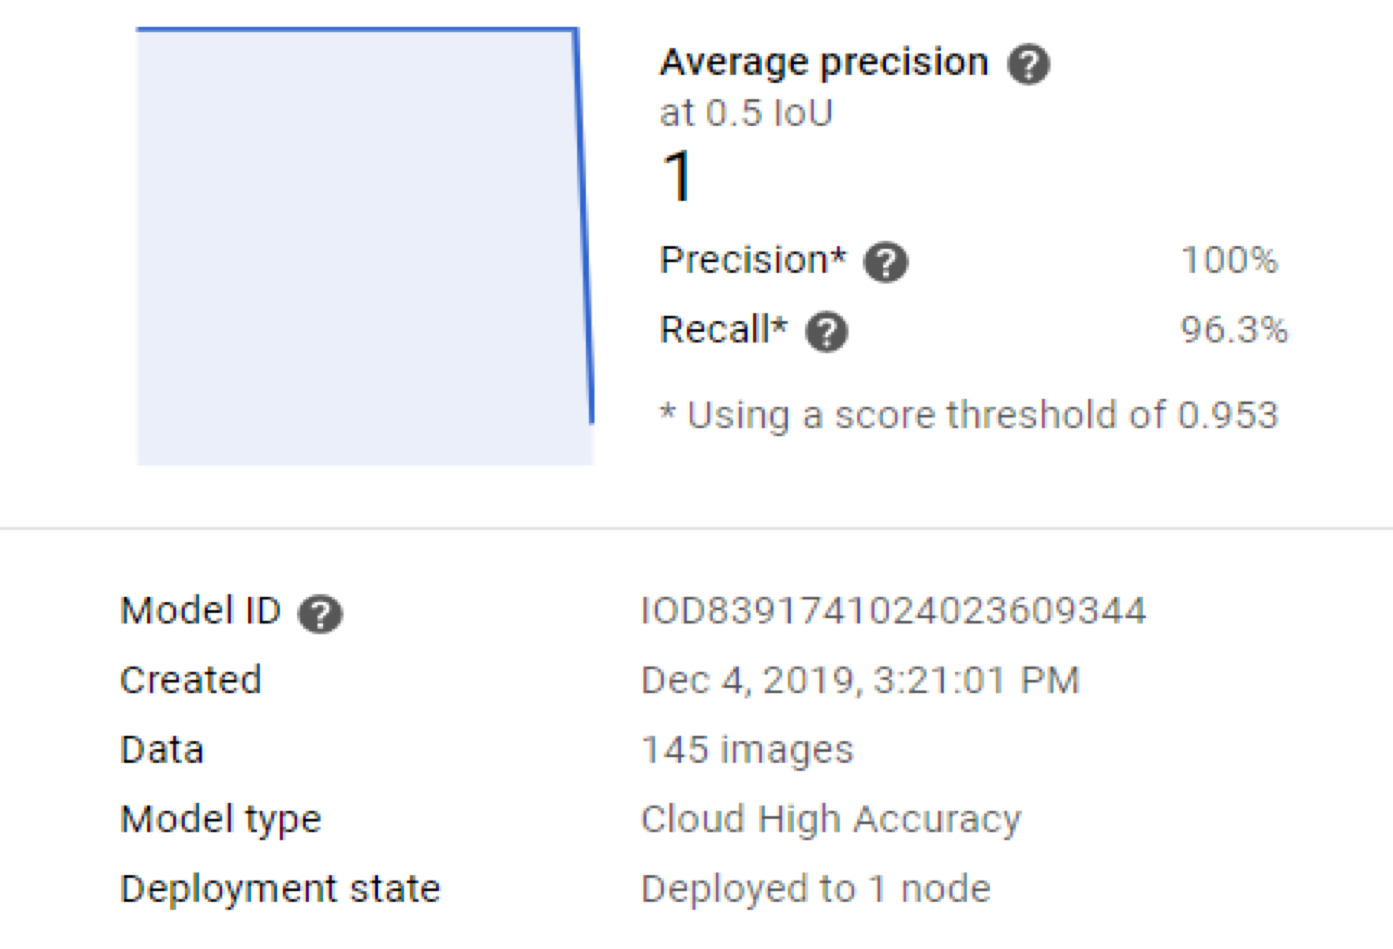
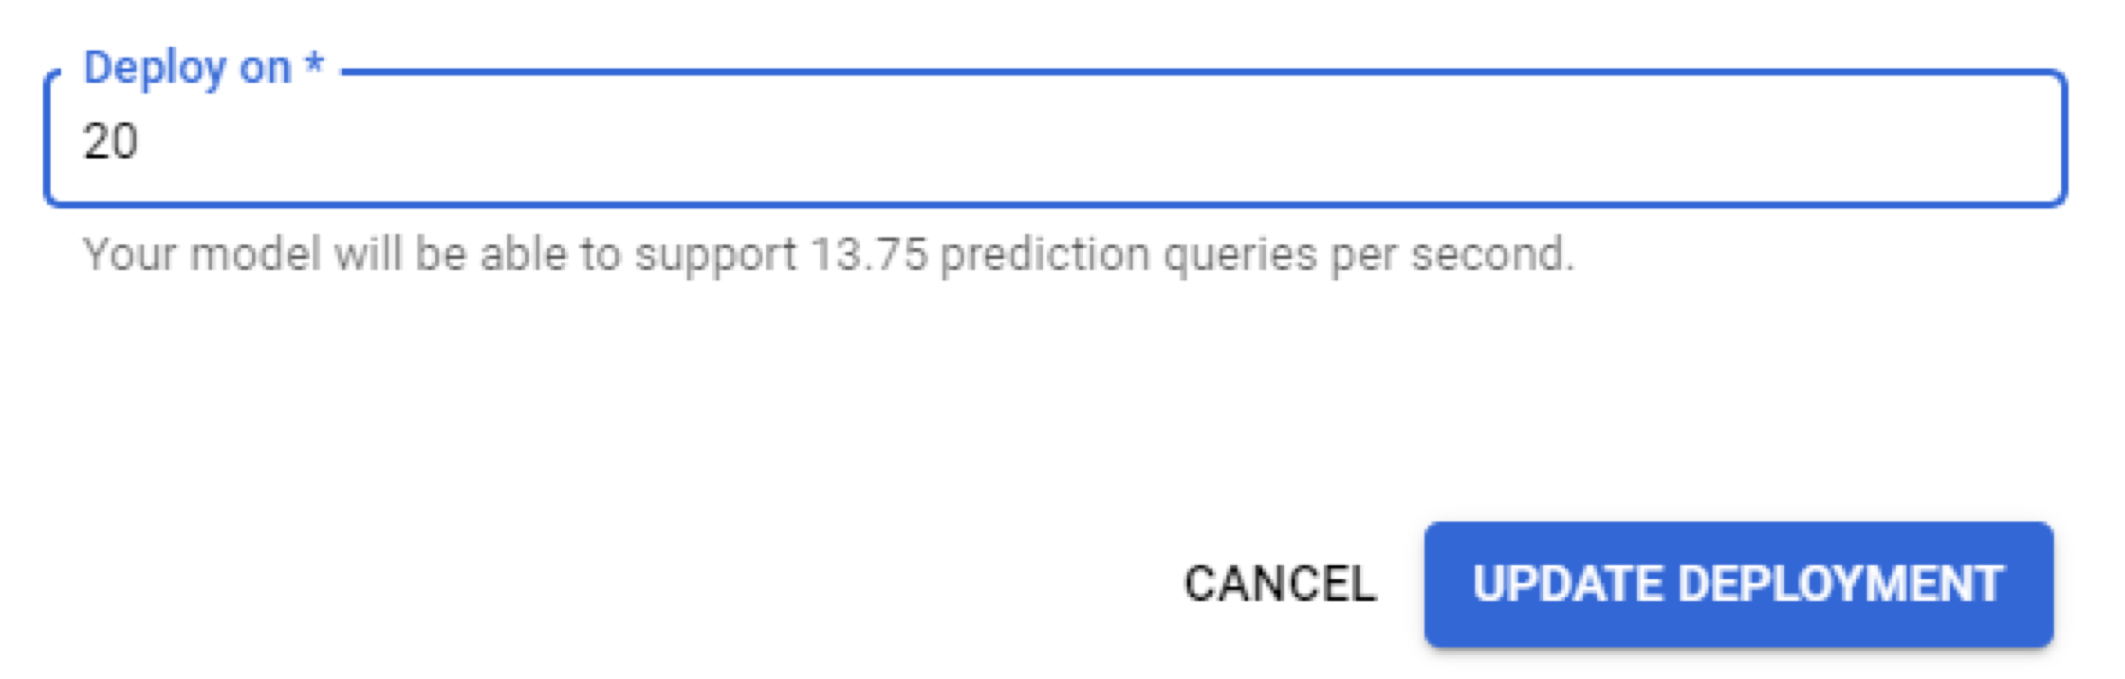
With a complete MVM, the next phase in an ML journey was deployment. When using AutoML Vision Detection, a model can be deployed by clicking the “Deploy Model” or “Update Deployment” button. When I did this, the result was a REST endpoint that could serve 0.69 predictions per second at $1.25 per hour. I could easily scale that up to serve 13.75 queries per second by simply increasing the node count to 20, as seen in the image below.
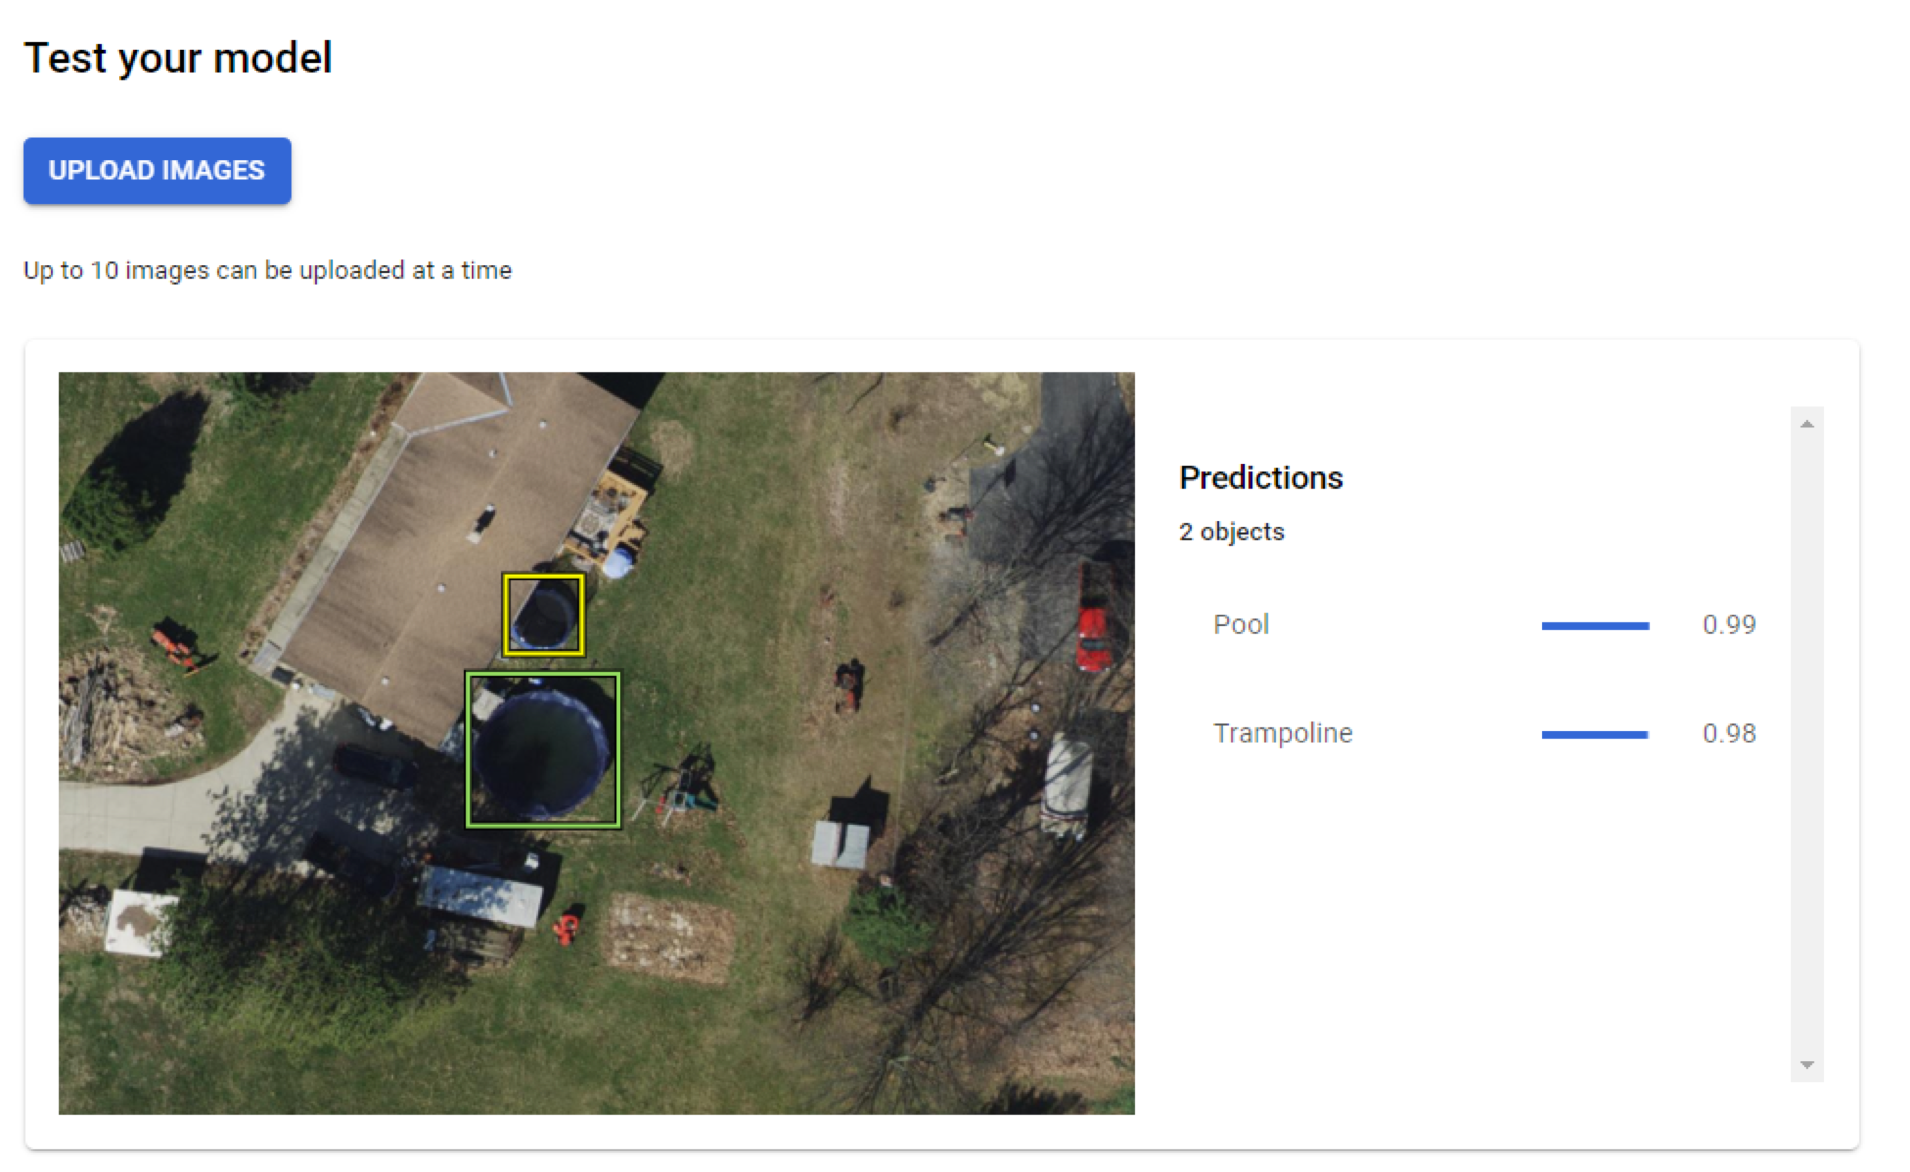
When the model is deployed, a web interface is provided to do real-time testing, as shown below. With this, I uploaded images and previewed the results. This sufficed as a quick and easy test to ensure my deployed model was working. But to operationalize the model into a line of business application, for example, a developer needs to implement the REST endpoint.
To operationalize my model, I wanted to create a useful application for my end users. So, I used the already-deployed REST endpoint and integrated it into a web app using OpenLayers. This application keeps track of real-time predictions and can load in previously made batch predictions. Though this is not a part of the AutoML Vision Detection product, operationalizing your model is a necessary step in an ML journey and is unique to everyone.

Summarizing My ML Journey
To recap, I defined the question I wanted to ask and then explored the data that could provide me with answers to that question. I then researched potential algorithms of image detection and found a low-friction solution, AutoML Vision Detection. This solution enabled me to quickly get the results I was looking for by building out a minimum viable model and iterate until I was satisfied with the results. Lastly, I deployed the model without having any capital expenditures. The deployed model was then finally used in an application to get real-time results.
Everyone's ML journey is different, some requiring multiple models, an immense amount of data discovery, preparation and even custom programming throughout the entire process. The key thing to remember is that this process should be agile, and by following a logical set of steps, one can very quickly get results and have a good idea of what it takes to put a model into production.
Woolpert can help you with your journey. We can guide and work alongside you to make your ML journey a successful one.

Geospatial Cloud Series 2020
July: Partnerships Expand Woolpert's Geospatial Footprint, Capabilities
August: Evaluating Geospatial SaaS Platforms to Meet Business Needs
September: Remote Sensing Data at Home in the Cloud
October-November: With Great Power of the Public Cloud Comes Even Greater Responsibility
December: Series in Review: Where the Cloud Intersects with Geospatial